Quiz builder
Question types and elements
Every question type and building block you can add to a quiz screen, and how to set answers, limits and layout.
5 min read·Updated October 20, 2026·All plans
In the appSalesQ/Quizzes/Edit/Questions
In this guide
- 01Pick the right question type for each step
- 02Add images, text, video and other blocks to a screen
- 03Make a question optional or allow several answers
- 04Lay out a screen in columns and hide blocks on one device
Before you start
- –A quiz open in the editor. See A tour of the quiz editor
There are two ways to add things to a quiz. A question type adds a whole new screen, ready to use. An element is a single block, such as an image or a line of text, that you drag onto an existing screen.
Add a question
- 1
Open the question types
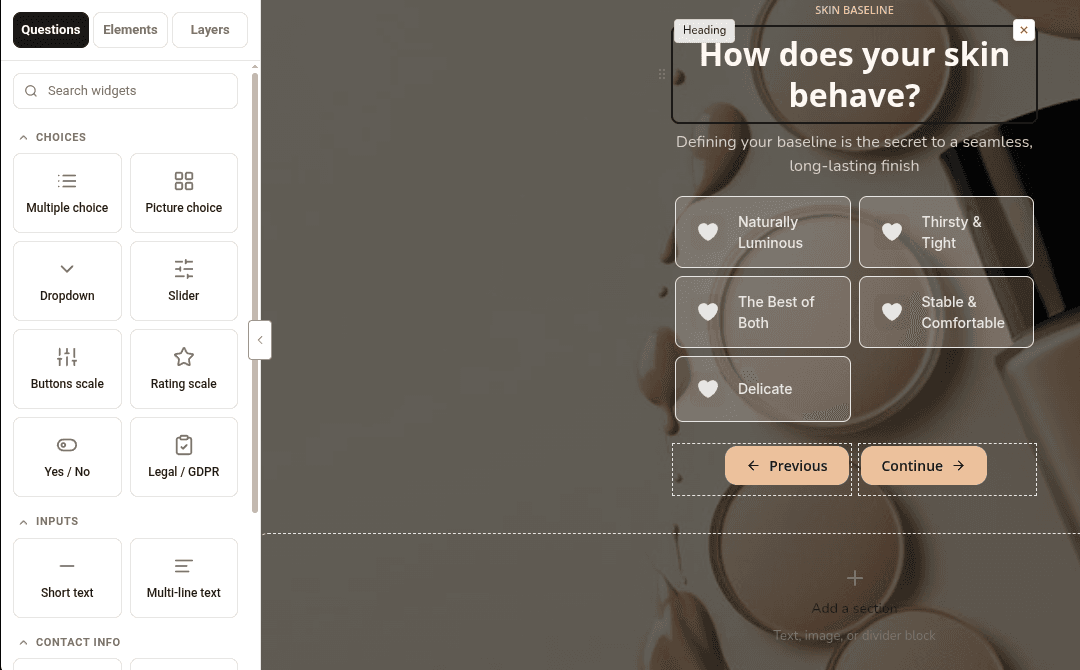
In the Questions tab, click the Questions sub-tab. Type in Search widgets to filter the list.
- 2
Click or drag a type
Click a card to add a new screen after the selected question, or drag it onto the canvas. Each new screen comes with a heading, a subheading, the answer field and Back and Next buttons.
| Question type | What shoppers see | Good for |
|---|---|---|
| Multiple choice | A list of answers, with optional icons or images | Most questions: skin type, style, budget |
| Picture choice | A grid of image tiles | Visual choices: colors, looks, product styles |
| Dropdown | A select list, with optional search | Long lists, such as countries or sizes |
| Slider | A range slider with your own labels | Amounts and ranges: age, budget, how often |
| Buttons scale | A row of numbered buttons, such as 1 to 10 | How much or how likely questions |
| Rating scale | Stars, hearts or circles to tap | Quick ratings |
| Yes / No | Two large buttons | Simple either-or questions |
| Legal / GDPR | A consent checkbox | Asking for marketing consent |
| Short text | A one-line text field | Short answers, such as a pet's name |
| Multi-line text | A larger text box | Open feedback |
| Name | A name field | Personalizing headings and emails |
| An email field | Collecting the email inside the quiz | |
| Phone | A phone field with a country code | Collecting a phone number |
Add elements to a screen
- 1
Open the elements
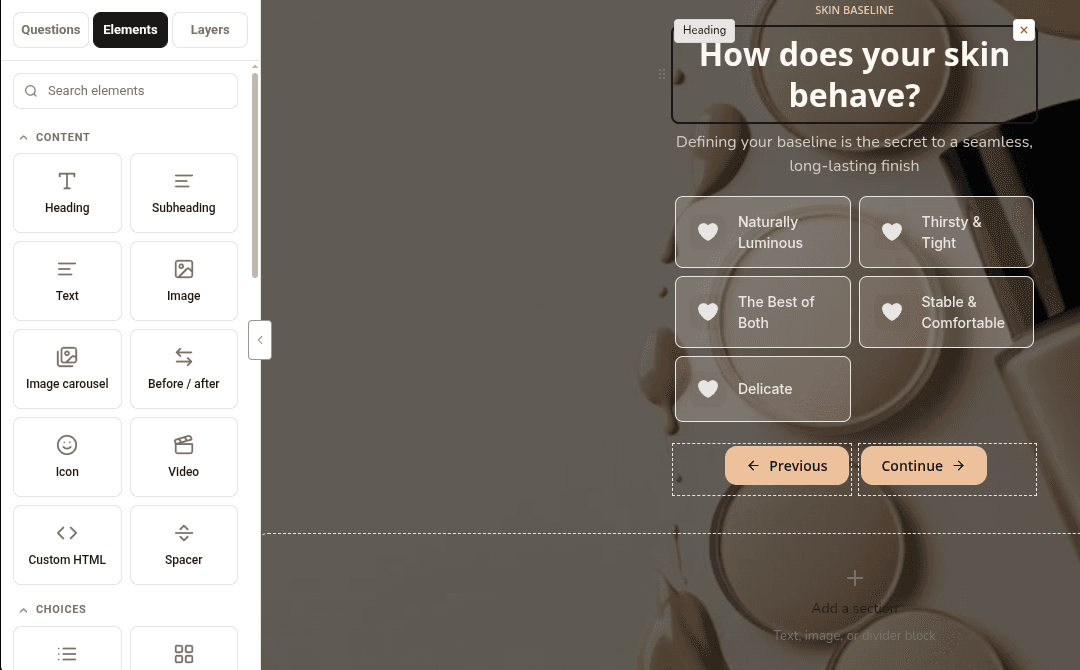
Click the Elements sub-tab. Type in Search elements to filter the list.
- 2
Drag an element onto the canvas
Elements can only be dragged, not clicked. Drop one into a column of the selected screen. A highlighted area shows where it will land.
| Group | Elements |
|---|---|
| Content | Heading, Subheading, Text, Image, Image carousel, Before / after, Icon, Video, Custom HTML, Spacer |
| Choices | Multiple choice, Picture choice, Dropdown, Slider bar, Buttons scale, Rating scale, Yes/No, Legal/GDPR |
| Inputs | Short text, Multi-line text, Number, Date, Name, Email address, Phone number |
| Navigation | Next button, Back button, Submit button |
| Charts | Gauge chart, Radar chart, Bar chart, Star rating (display). Each shows the values you type into its settings. |
Number and Date are only available as elements, so drag them onto a screen that already has a heading and buttons.
Change an element's settings
Click any block on the canvas. Its settings open on the left in three tabs: Content for what it says and does, Style for fonts, colors, borders and spacing, and Advanced for extra layout options.
- 1
Make a question optional
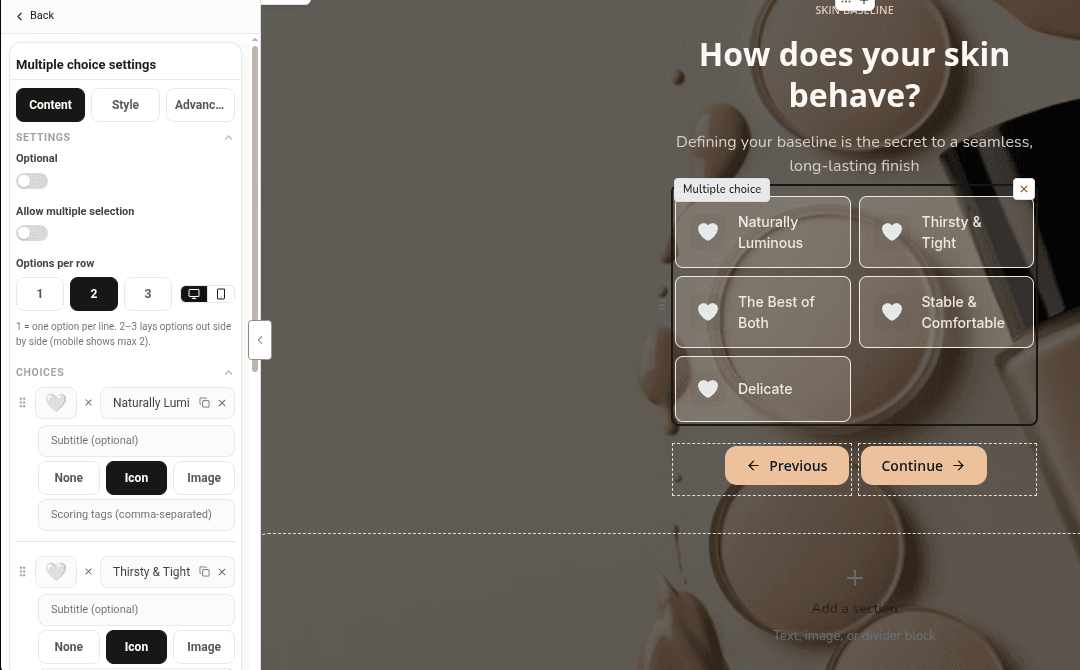
In Content, turn on Optional. Shoppers can then click Next without answering. Required questions keep Next turned off until they're answered.
- 2
Allow several answers
On a Multiple choice or Picture choice block, turn on Allow multiple selection. Set Min selected and Max selected (from 1 to 10) and the Error message shoppers see if they pick too few or too many.
- 3
Set answers per row
Use Options per row to show 1, 2 or 3 answers side by side. You can set a different value for mobile.
- 4
Edit an answer
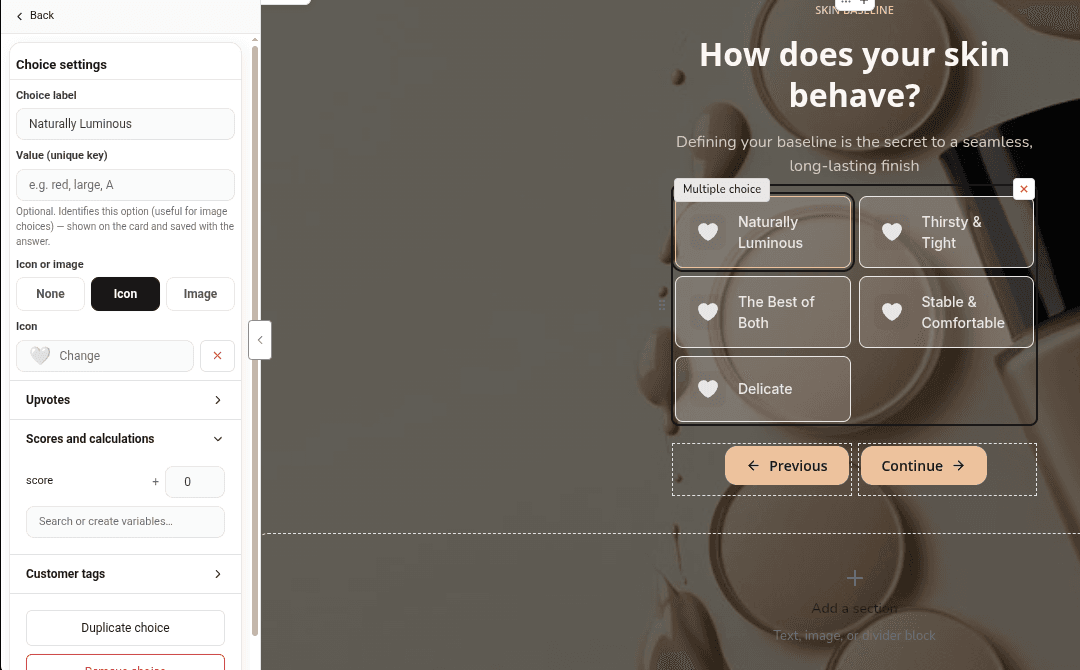
Click an answer on the canvas to open Choice settings. Change Choice label, and under Icon or image add an emoji icon or a picture.
- 5
Limit text answers
On Short text and Multi-line text, set Min length and Max length (0 means no limit) and an Error message.
Lay out a screen
- 1
Add a row with columns
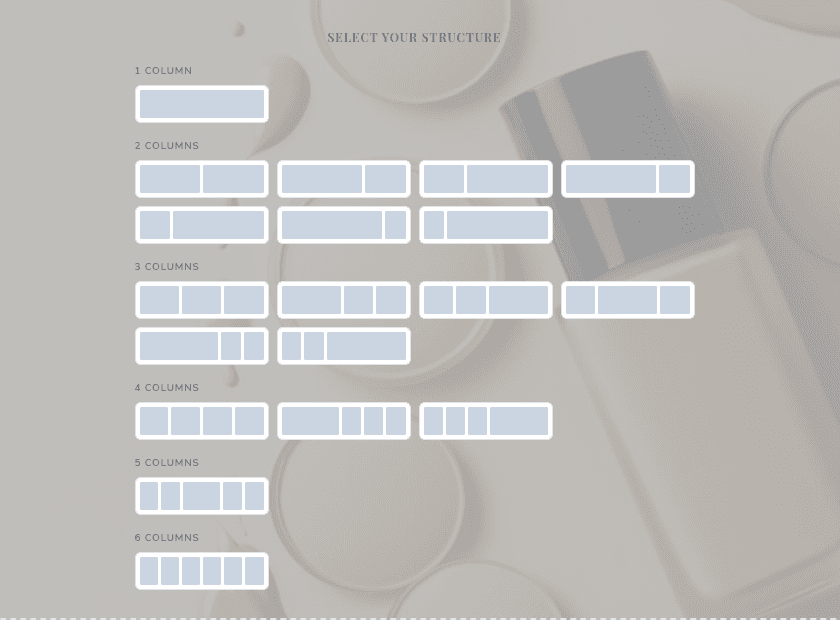
Click Add a section under the screen and pick a layout, such as 2 equal for an image next to the answers.
- 2
Adjust the row
Click an empty spot in the row to open Container settings. Change its width, height, padding, the gap between columns and how they line up.
- 3
Show a block on one device only
Open a block's Style tab and turn on Hide on desktop or Hide on mobile. Use Mobile preview in the top bar to check the phone layout.
Learn more
Related articles
- Editor tourWhat each part of the quiz editor does: the top bar, the six tabs, the left panel and the canvas.→
- Results and productsBuild the pages shoppers see at the end of the quiz, and choose how products are picked: one page per outcome, or products attached to each answer.→
- Capture emailsAdd an email page before the result, or ask for the email inside a question, and collect names, phone numbers and marketing consent.→
Was this page helpful?
Still need help?
Can't find what you need? Talk to the people who build the app.