Quiz builder
Result pages and product recommendations
Build the pages shoppers see at the end of the quiz, and choose how products are picked: one page per outcome, or products attached to each answer.
5 min read·Updated October 20, 2026·All plans
In the appSalesQ/Quizzes/Edit/Results
In this guide
- 01Add and arrange result pages
- 02Show fixed products for each outcome
- 03Attach products to each answer with Answer mapping
- 04Add cart, coupon and retake buttons to a result page
Before you start
- –A quiz with at least one question. See Create your first quiz
- –The products and collections you want to recommend, published in your store
Result pages are what shoppers see after the last question. They show your product picks, plus buttons to add them to the cart, see a discount code or retake the quiz. There are two ways to decide which products a shopper sees.
| Method | How it works | Best for |
|---|---|---|
| One page per outcome (Score, the default) | Each result page has its own fixed products. Logic sends each shopper to one page. | Clear outcomes, such as skin types or style profiles. |
| Answer mapping | Each answer carries its own products. One result page shows the products for every answer the shopper picked. | Building a set or routine from several answers. |
Add result pages
- 1
Open the Results tab
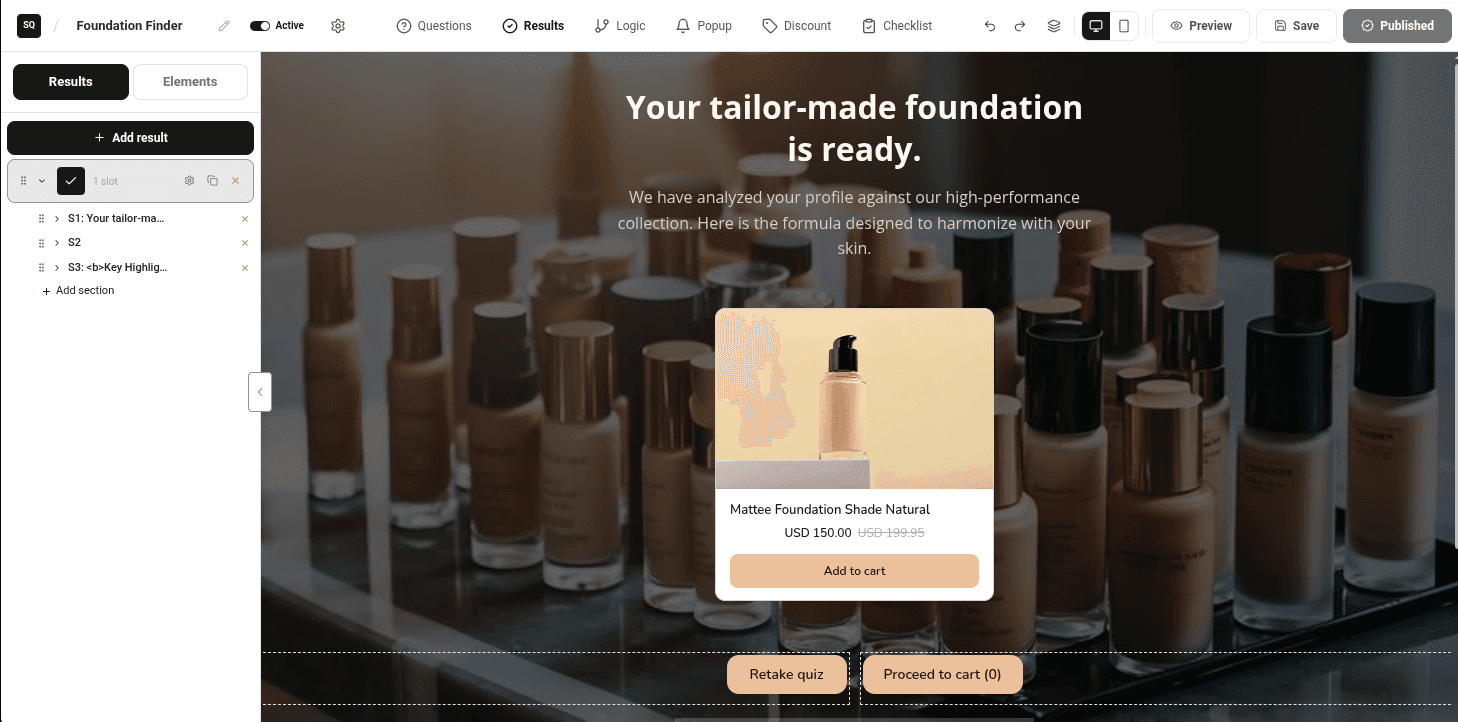
Click Results in the top bar. The first result page opens on the canvas. A new quiz has one page, called Your result.
- 2
Add a page
Click Add result for each outcome. Use Duplicate on a page's row to copy one you've already built.
- 3
Name and size the page
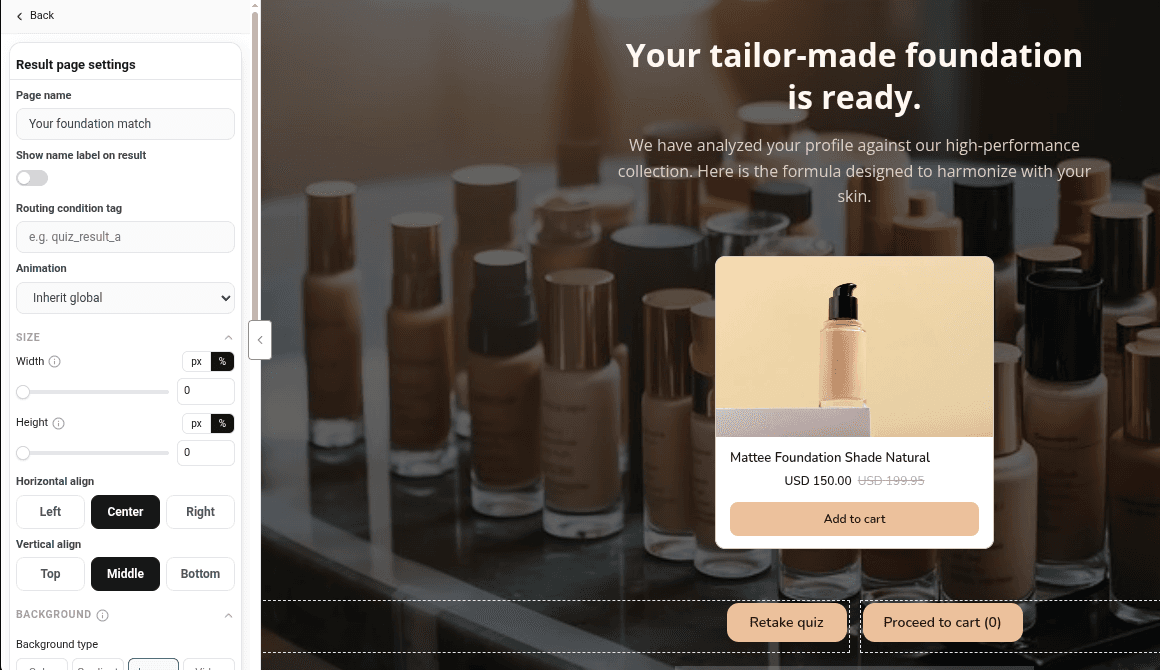
Click Settings on the page's row to open Result page settings. Type a Page name. Turn on Show name label on result to show the name to shoppers. You can also change the page's Width, Height and Background.
- 4
Put them in order
Drag pages by their handle to reorder them. The order matters when you use display rules, because the first matching page is shown.
Add elements to a result page
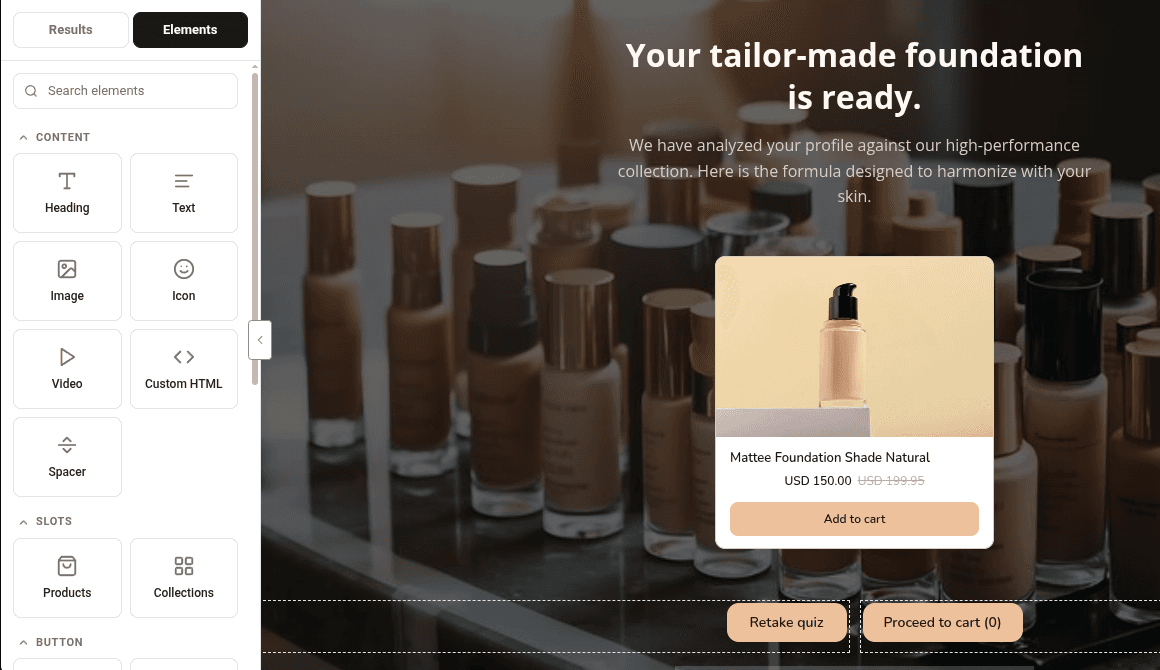
Click the Elements sub-tab and drag blocks onto the result page. A new result page already has a Products block, a Retake quiz button and a Cart/checkout button.
| Element | What it does |
|---|---|
| Products | Product cards with image, title, price and Add to cart, grouped in slots. |
| Collections | Collection cards that link to your collections. |
| Button | A link button to any page. |
| Cart/checkout | Adds the recommended products to the cart, then goes to the cart or checkout. A quiz discount code is applied automatically. |
| Retake quiz | Starts the quiz again from the first question. |
| Coupon | Shows the shopper's discount code with a copy button. |
| Heading, Text, Image, Icon, Video, Custom HTML, Spacer | Content to explain the result. |
| Gauge chart, Radar chart, Bar chart, Star rating display | A chart or rating with the values you enter. Use a different chart on each result page. |
Show fixed products on each page
- 1
Select the Products block
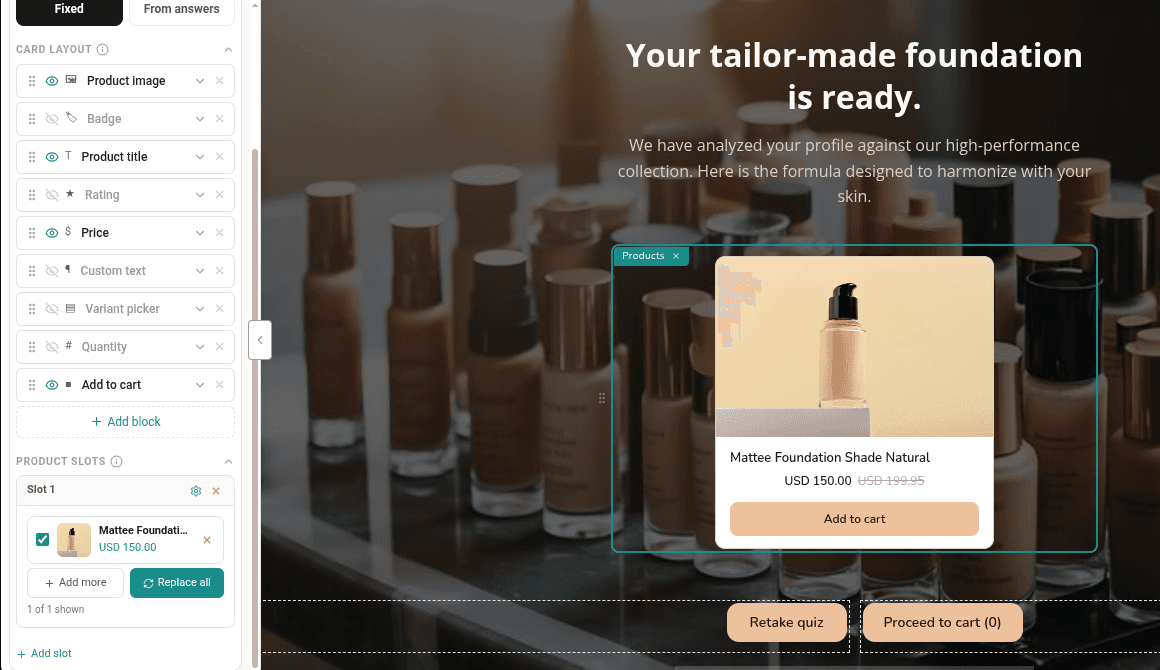
Click the Products block on a result page. Under Content source, leave Source set to Fixed.
- 2
Pick the products
Under Product slots, click Select products and choose from your store in the Shopify picker. Use Add more or Replace all to change them later.
- 3
Group products in slots
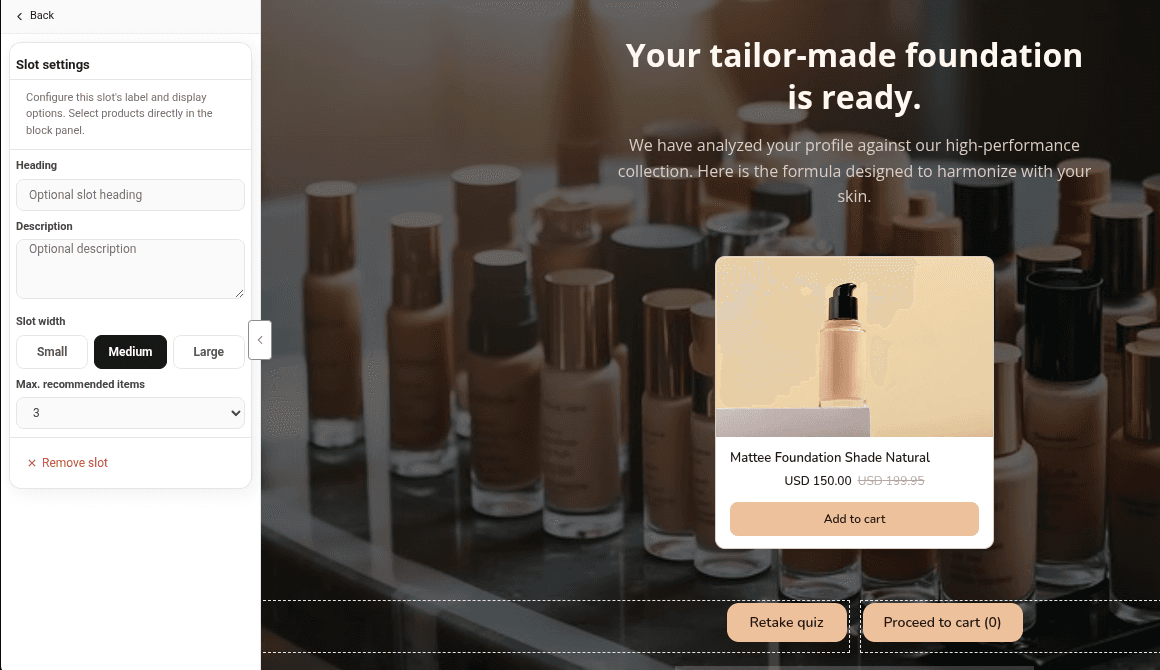
Click Add slot to show a second group, for example a main product and a matching extra. Click a slot to set its Heading, Description, Slot width and Max. recommended items.
- 4
Choose what each card shows
Under Card layout, turn parts of the card on or off and drag them into order: Product image, Product title, Price, Variant picker, Quantity, Add to cart and more.
- 5
Send shoppers to the right page
Repeat for each result page, then open the Logic tab to decide which answers lead to which page. See Send shoppers to the right result.
Recommend products per answer
- 1
Switch to Answer mapping
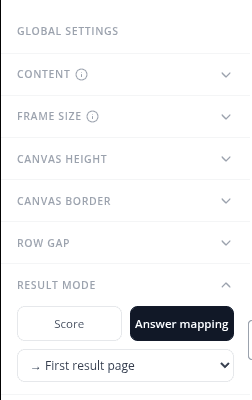
Click the gear icon (Global settings), open Result mode and choose Answer mapping. Pick the result page that shows the recommendations. By default it's → First result page.
- 2
Give each answer a recommendation
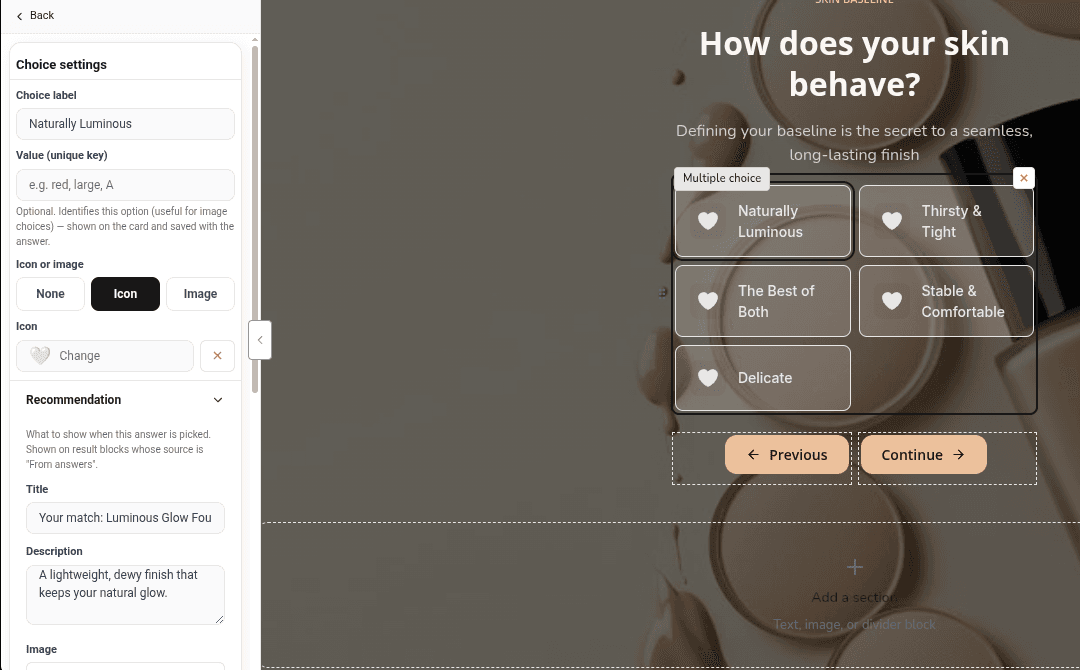
In the Questions tab, click an answer on the canvas to open Choice settings. Under Recommendation, fill in a Title and Description, add an Image, and pick Products or Collections.
- 3
Point the result page at the answers
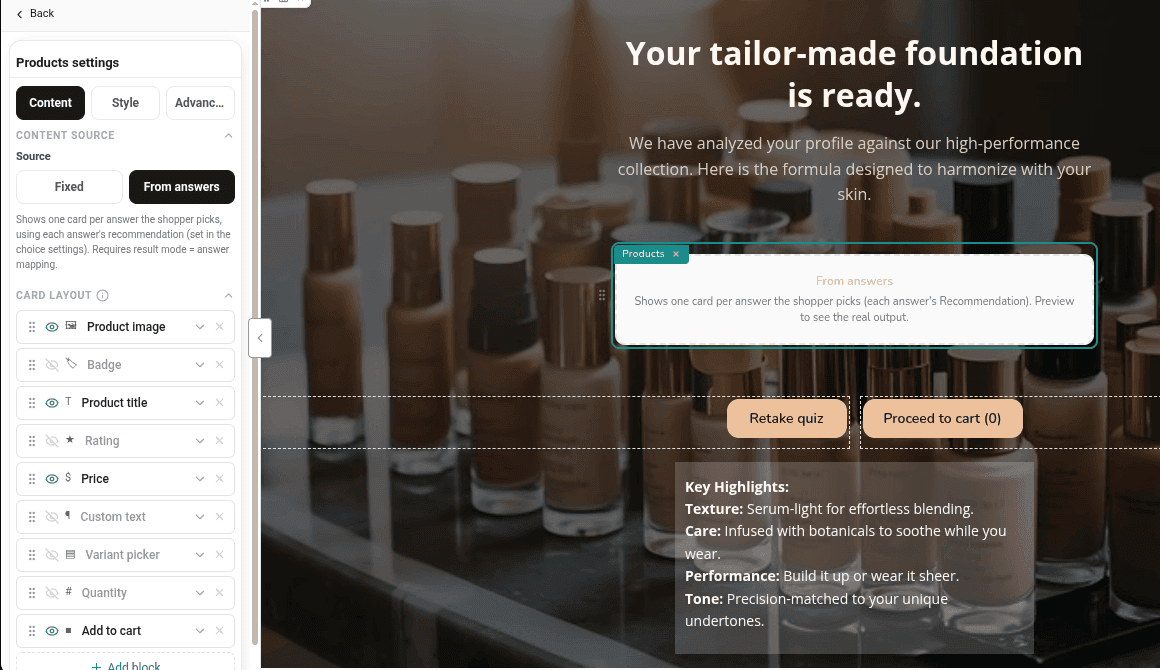
In Results, open the page you picked and click its Products block. Set Source to From answers. Do the same for any Collections block.
- 4
Preview it
Click Preview and try different answers. The result page shows one group of products for each answer you picked, in the order you answered.
Send shoppers to the cart or checkout
Click the Cart/checkout button to change its Button text and Next destination for users: Checkout or Cart. Turn on Enable "Add all to cart" button to let shoppers add every recommended product in one click. If you only want this button, turn on Hide per-product "Add to cart" on the Products block.
Learn more
Related articles
- Logic and branchingUse the Logic tab to send each answer to the right result page, jump to another question, or skip questions that don't apply.→
- Discount codesEvery new quiz gives shoppers a Shopify discount code when they finish. Change the offer, show the code on the result page, or turn it off.→
- CartsSee the carts shoppers start after a quiz, which ones were abandoned or converted, and which quizzes they came from.→
Was this page helpful?
Still need help?
Can't find what you need? Talk to the people who build the app.