Quiz builder
Capture emails in your quiz
Add an email page before the result, or ask for the email inside a question, and collect names, phone numbers and marketing consent.
3 min read·Updated October 20, 2026·All plans
In the appSalesQ/Quizzes/Edit/Questions/Add email page
In this guide
- 01Know when shoppers are asked for their email
- 02Add and edit your own email page
- 03Collect a name, phone number and marketing consent
- 04Greet shoppers by name in your quiz
Before you start
- –A quiz with questions and a result page. See Create your first quiz
Shoppers are asked for their email after the last question, just before they see their result. The email is what turns a quiz answer into a subscriber, a discount code and a follow-up email.
The email step is skipped when the quiz already knows the email: when the shopper is logged in to your store, or when an earlier question asked for it.
Add an email page
- 1
Add the page
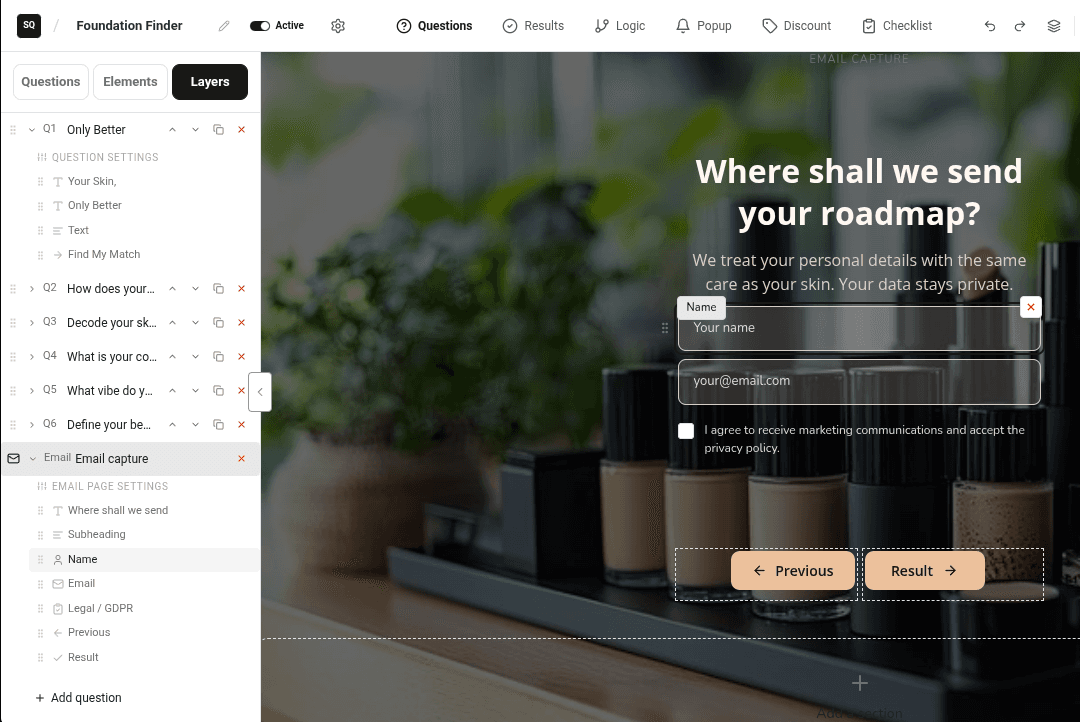
In the Questions tab, open the Layers sub-tab and click Add email page at the bottom. A quiz can have one email page. It always shows after the last question.
- 2
Edit the text
The page starts with the heading Your recommendation is ready., a line about revealing the result and a 10% code, an email field, a consent checkbox and a Reveal button. Click each block to change its text.
- 3
Add a name or phone field
Open the Elements sub-tab and drag Name or Phone number onto the email page. Set each field's Label, Placeholder and whether it's Optional.
- 4
Set up consent
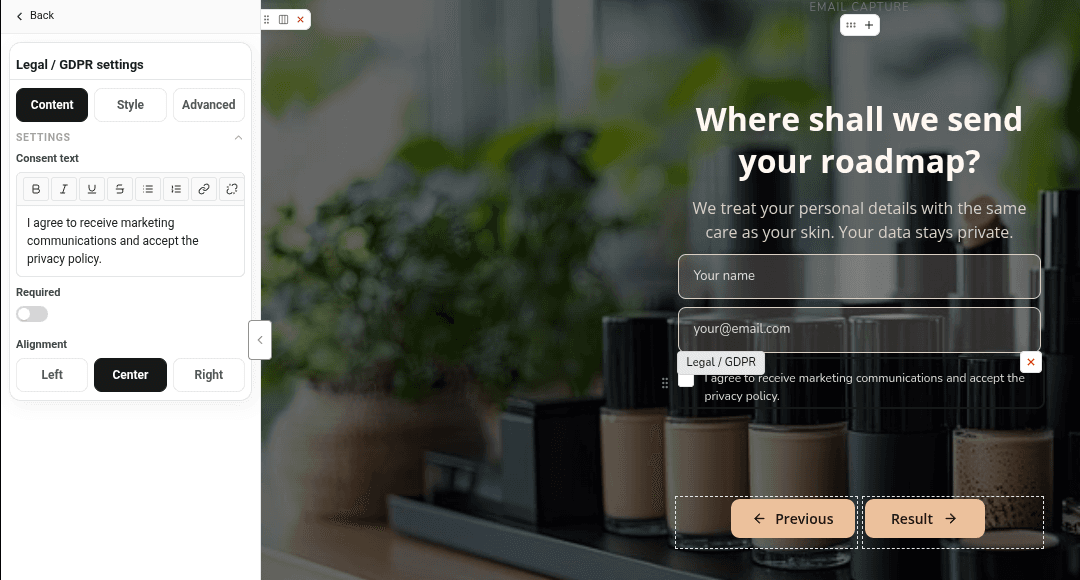
Click the consent checkbox. Change the wording in Consent text and turn on Required if shoppers must tick it to continue.
- 5
Save
Click Save, then try the email step in Preview.
Or ask for the email inside a question
You can collect the email earlier in the quiz. In the Questions sub-tab, click Email to add an email question, or drag Email address from Elements onto an existing screen. Shoppers who answer it go straight to their result at the end, with no separate email step.
How consent is recorded
A Legal/GDPR checkbox on the email page, or on the same screen as an email field, records whether the shopper agreed to marketing. You can see each subscriber's consent on their subscriber profile.
Greet shoppers by name
- 1
Ask for the name
Add a Name question, or a Name field on the email page.
- 2
Use the name in a heading
In any Heading that comes after the name, type {{name}}, {{first_name}} or {{last_name}}. For example: "{{first_name}}, here's your routine".
- 3
Set a fallback
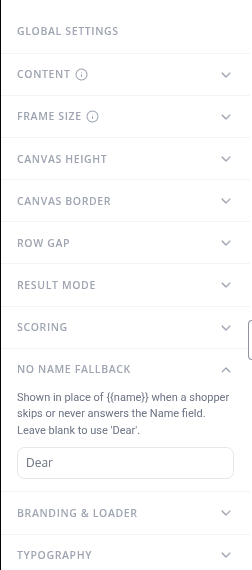
Click the gear icon (Global settings) and open No name fallback. Type what shows when a shopper skips the name. If you leave it blank, the quiz uses "Dear".
What happens when a shopper submits
- The shopper is saved as a subscriber, with their answers, name, phone and consent. See Find and filter subscribers.
- They're added to your Shopify customers, or matched to an existing customer.
- A discount code is created if the quiz offers one. See Offer a discount code on results.
- Your quiz follow-up emails can start.
Learn more
Related articles
- Question typesEvery question type and building block you can add to a quiz screen, and how to set answers, limits and layout.→
- Discount codesEvery new quiz gives shoppers a Shopify discount code when they finish. Change the offer, show the code on the result page, or turn it off.→
- Subscriber profileSee a subscriber's quiz answers, discount codes, marketing consent and Shopify orders, and unsubscribe or re-subscribe them.→
Was this page helpful?
Still need help?
Can't find what you need? Talk to the people who build the app.